
How To Optimize Your Images For Web
Images make up a large part of your website. Lowering the file size, without greatly reducing the quality, will make your site load faster on all devices and connection speeds.
Optimizing Banner Images
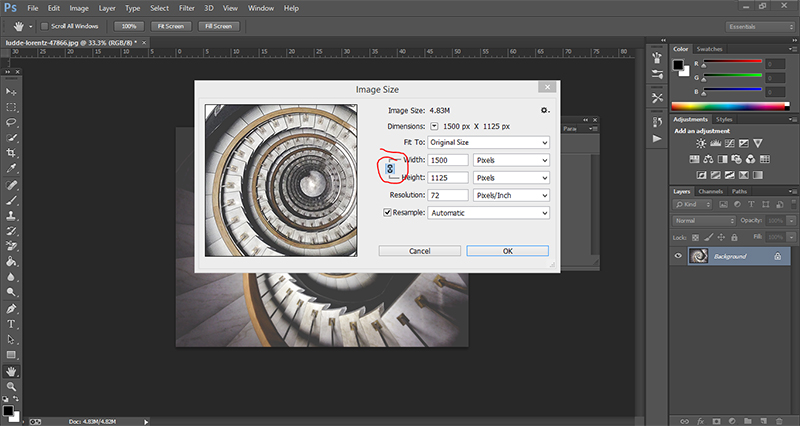
1. Begin by opening your chosen image in Photoshop. Use the shortcut ctrl + alt + i on your keyboard. Alternatively, click the 'Image' tab followed by 'Image Size'.
2. In the popup box, change the width to 1500 pixels and click 'OK'. This is the ideal width for a Squarespace banner image. The height will automatically adjust to preserve the image proportions. If this does not happen, click the chain icon as highlighted in the image below.
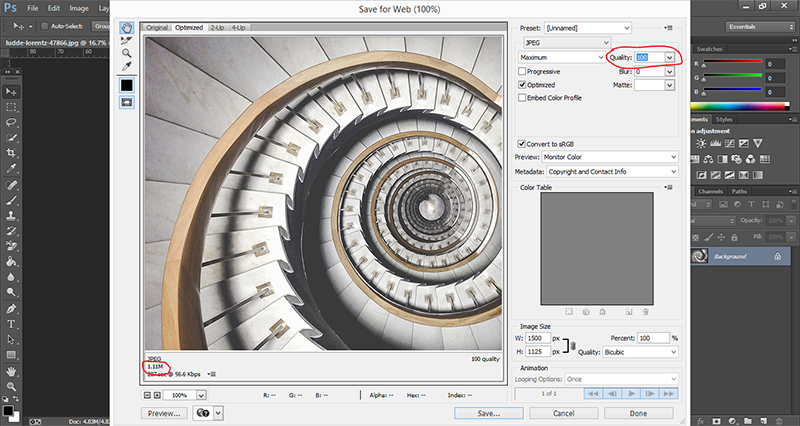
3. Now that the image has been resized, it is ready to be optimized. Go to 'File' then 'Save for Web'. Highlighted in the image below are the quality and the file size. The quality should be reduced until the image begins to look pixelated. As the quality is reduced, the file size will go down. Try to get the file size to around 200k.
NOTE: In later versions of photoshop, this function is called 'Save for Web Legacy'
4. Once you are happy with the size / quality of the file, click save. When naming the file, it is ideal to put in as many relevant key words as possible. For example 'interior-photography-edinburgh-leith.jpeg'